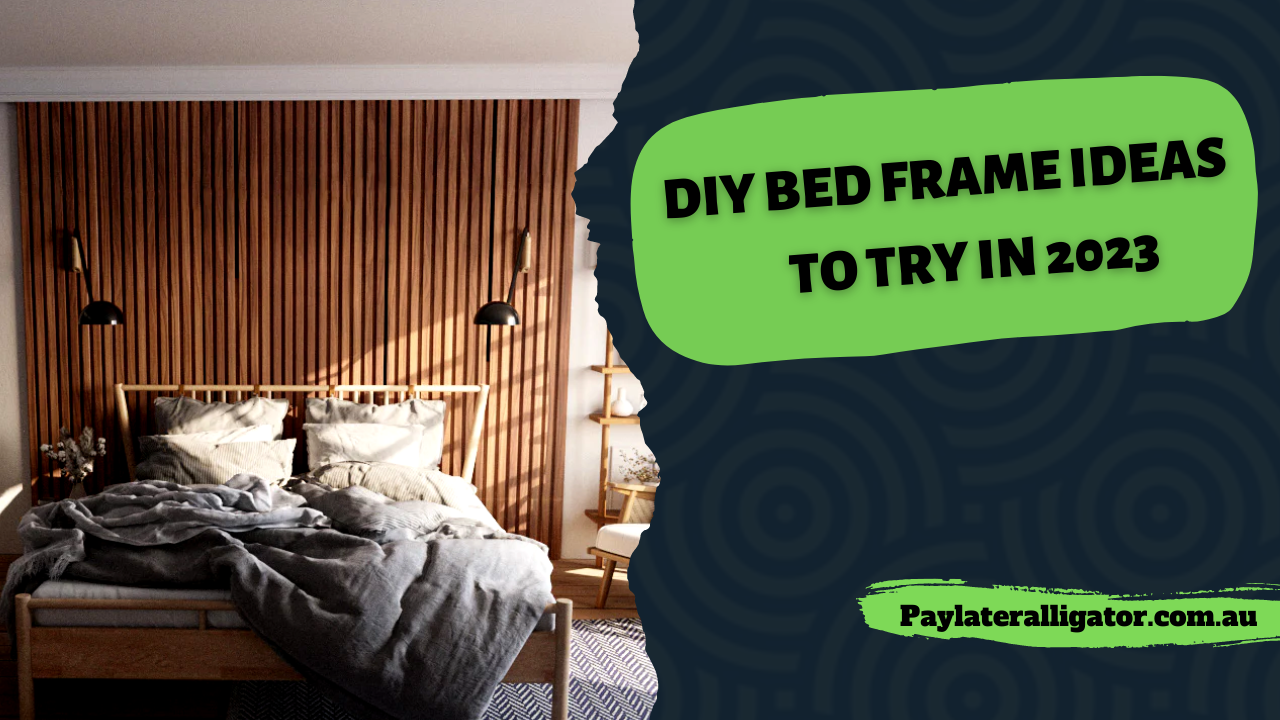
Amazing DIY Bed Frame Ideas to Try in 2023
Have you ever dreamed of owning a stylish and beautiful bed frame but don’t want to spend money on expensive furniture? Do you love DIY projects and are looking for the perfect project that will showcase your skills and make your bedroom look stunning? Then you’re in the right place!
10+ DIY Bed Frame Ideas
In this article, we will explore DIY bed frame ideas that you can make at home. From modern minimalism to rustic elegance, there is something for everyone. Read on to learn more about how to make your own bed frame with ease!
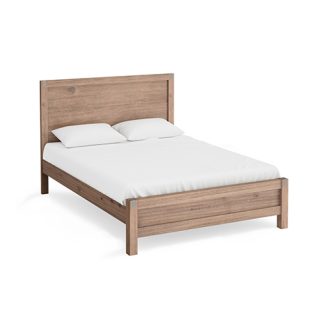
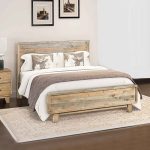
DIY Farmhouse Storage Bed with Storage Drawers
Looking to build your own bed frame? Check out this DIY Farmhouse Storage Bed with Storage Drawers! This bed frame is easy to build and features plenty of storage space for all your bedroom essentials. Plus, the rustic farmhouse style will complement any décor.
Materials:
- 1×4 lumber (8 ft.)
- 1×6 lumber (8 ft.)
- 2×4 lumber (8 ft.)
- Plywood (4’x8′ sheet)
- 1/4″ MDF panel (4’x8′ sheet)
- Wood glue
- Construction adhesive
- Nails or screws
- Paint or stain

Tools: Circular saw -Jigsaw -Power drill -Countersink bit -Paintbrush or roller
Instructions:
1. Cut the lumber to size.
Cut the 1x4s and 1x6s to create the frame for the bed, as well as the 2x4s for the legs. The plywood and MDF panel will be used for the drawer bottoms.
2. Assemble the bed frame.
Use wood glue and construction adhesive to attach the 1x4s and 1x6s together, forming a rectangle. Then, attach the 2×4 legs to each corner using nails or screws.
3. Add the drawer bottoms.
Cut the plywood and MDF panel into pieces that will fit snugly inside the frame and there you have it!!
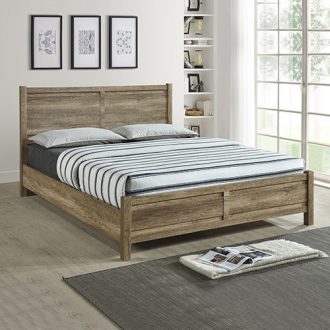
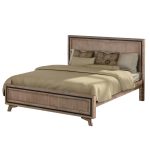
DIY Rustic Modern King Bed
- Cut your lumber to size. You’ll need four 2x8s for the frame and six 2x6s for the slats.
- Assemble the frame using wood glue and screws. Drill pilot holes first to avoid splitting the wood.
- Cut the slats to size and attach them to the frame using screws. Space them evenly so that there’s room for air to circulate.
- Finish the bed by sanding down any rough edges and staining or painting it as desired.

DIY Repurposed Wood Headboard
A headboard is one of the most important elements in a bedroom. It’s not only a functional piece that keeps pillows from falling off the bed, but it also adds style and personality to the room. If you’re looking for a unique headboard that will make your bedroom stand out, consider repurposing an old piece of wood.
To make a repurposed wood headboard, you’ll need an old door, some reclaimed wood, or an old wooden pallet. Once you have your materials, sand down the wood and stain or paint it to your liking. Then, simply attach the headboard to the wall using screws or nails.

Not only is this DIY project easy to do, but it’s also budget-friendly. And best of all, you’ll end up with a one-of-a-kind headboard that looks like it came from a high-end store.
DIY Pallet Queen Size Bed Frame
One of the most popular ways to upcycle pallets is by turning them into a bed frame. A pallet queen-size bed frame is a great way to add rustic charm to your bedroom, and it’s also a budget-friendly option.
There are a few things you’ll need to consider before building your bed frames, such as the type of pallets you’ll use and the size of your mattress. You’ll also need to make sure the pallets are in good condition and free of any splinters.

Once you’ve gathered all the materials you need, it’s time to start building! Follow these simple steps to create your own pallet queen-size bed frame:
- Start by stacking two pallets on top of each other. Make sure they’re aligned and flush with each other.
- Using three boards, create a frame around the outside of the pallets. Nail or screw the boards into place.
- Repeat step two on the other side of the pallets.
- Now it’s time to add some support in the middle of the bed frame. Cut two boards to fit between the two stacked pallets and nail or screw them into place.
- For extra stability, you can add diagonal braces across the middle of the bed frame. Cut four boards and attach them to each corner using nails or screws.
- The last step is to add some legs to your bed frame and you’re all set.
Also Read: Awesome Indoor DIY Rabbit Cage Ideas for 2023 – Bunny House Setups
DIY Platform Storage Bed
When it comes to DIY platform storage beds, there are few designs that can beat this one in terms of both aesthetics and functionality. This bed frame can also be achieved with two floating nightstands that are perfect for storing books, glasses, or a small lamp.

You can simply take some MDF or partial boards and place them on the floor to make a simple platform bed. For storage options, you can cut the board into pieces and make drawers out of them. The platform itself is raised off the ground, making it easy to clean underneath.
DIY Industrial Pipe Bed Frame
Looking to add a touch of industrial chic to your bedroom? This DIY Industrial Pipe Bed Frame is the perfect project!
This bed frame is made with simple materials that you can find at any hardware store, and it’s easy to put together. The end result is a stylish and sturdy bed frame that will last for years.
Here’s what you’ll need to make your own DIY Industrial Pipe Bed Frame:
- 4 pipes (1 inch diameter, 10 feet long)
- 8 pipe flanges (1 inch diameter)
- 4 pipe elbows (1 inch diameter)
- 16 screws (1/2 inch long)
- 4 casters (optional)

Start by cutting your pipes to size. Then, use the pipe flanges and screws to assemble the frame. If you’re using casters, screw them into the bottom of the frame so that it’s easy to move around. Finally, attach the pipe elbows to the top of each leg so that they form a point. That’s it! Your Industrial Pipe Bed Frame is now ready to use.
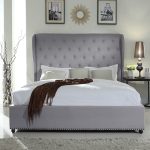
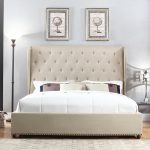
Tufted Bed Frame
A tufted bed frame is a great way to add style and comfort to your bedroom. It’s easy to DIY, and you can find everything you need at your local hardware store.
Here’s what you’ll need to make your own tufted bed frame:
- Plywood
- Foam padding
- Fabric
- Batting
- Button tufts
- Thread
- Nailhead trim (optional)
Start by cutting your plywood to size. You’ll need two pieces that are the same width as your mattress, and two pieces that are the same height as your headboard plus 4 inches. Then, cut your foam padding to fit the plywood. Wrap the foam in batting, then fabric, and staple it in place.

Next, mark where you want your button tufts to go. Make sure they’re evenly spaced and centred on the panel. Cut small holes in the fabric at each mark, then insert the button tufts through the holes from the back side. Tie a knot on the back of each button to secure it in place.
Finally, attach your headboard panels to the bed frame using screws or nails. If you’re using nailhead trim, hammer it into place along the edges of the headboard for a finishing touch.
Also Read: 10+ DIY Bedside Table Ideas – Beautiful Nightstand for Your Home
Barn Wood Bed Frame
There are few things more rustic and charming than a bed frame made of reclaimed barn wood. This type of bed frame has a history and story to tell, and it also adds a unique and inviting touch to any bedroom.
Building a barn wood bed frame is not as difficult as it may sound. With the right tools and materials, you can easily put together a beautiful and sturdy bed frame that will last for years. Here are the basics of what you’ll need to get started:
Reclaimed barn wood boards (enough to build your desired frame size)
- A saw (circular or hand saw)
- Nails or screws
- Sandpaper
- Stain or paint (optional)

Once you have all of your materials, you’re ready to start building! Begin by cutting your barn wood boards to the desired length for your bed frame. If you’re not sure how to do this, there are plenty of online tutorials or you can ask someone at your local hardware store for help. Next, assemble the frame using nails or screws. Be sure to use sturdy joints so that your frame is strong and stable.
Once the frame is assembled, you can sand down any rough edges and stain or paint it if desired. Then simply add your mattress and pillows, and enjoy your new rustic barn wood bed!
Bed Frame with Hardwood Flooring
If you want your bedroom to have a luxurious feel, consider a bed frame with hardwood flooring. Hardwood floors are not only beautiful, but they’re also durable and easy to care for. You can find pre-finished hardwood floors at most home improvement stores, or you can have them custom-made to match your décor.

When choosing a hardwood floor for your bed frame, keep in mind that darker woods will show scratches more easily than lighter woods. If you’re concerned about scratches, choose wood with a smooth finish. You can also use area rugs to protect your floors and keep them looking like new.
- Also Read: 10+ Best DIY Small Laundry Room Ideas
Painted Wooden Bed Frame
A painted wooden bed frame is a great way to add a touch of personality to your bedroom. You can paint your bed frame in any colour you like, or even in multiple colours if you want a more eclectic look. If you’re feeling creative, you can even paint patterns or designs on your bed frame.

To get started, all you need is a wood bed frame and some paint. Be sure to sand down the bed frame first so that the paint will adhere properly. Once your bed frame is painted, you can add a headboard and footboard if you like, or leave the frame as-is for a more minimalist look.
Full Storage Pallet Bed Headboard with Lights
The first step is to find a full storage pallet bed headboard. You can either find one online or at a local store. Once you have the headboard, you need to determine where you want the lights to go. You may need to drill holes in the headboard to accommodate the wires.

After the holes are drilled, run the wires through them and connect the lights to a power source. Finally, screw or nail the headboard to the frame of your bed.
Also Read: Amazing DIY Outdoor Kitchen Ideas with BBQs for Small Backyard and Patio
LED Bed Frame
If you want to add a touch of luxury to your bedroom, then why not build an LED bed frame? This project is relatively easy to do, and it will make your bedroom look amazing!
To build an LED bed frame, you will need:
- 4 LED strips
- A drill
- A saw
- Some wood screws
- Wire cutters
First, you need to determine the size of your bed frame. Once you know the dimensions, cut the wood to size using a saw. If you don’t have access to a saw, you can have the wood cut at a hardware store.
Next, use a drill to create holes for the LED strips. Make sure that the holes are big enough for the strips to fit snugly.

Now, it’s time to assemble the frame. Start by screwing in the sidepieces, then add the headboard and footboard. Once everything is in place, carefully attach the LED strips to the inside of the frame. You may need someone to help you hold them in place while you screw them in.
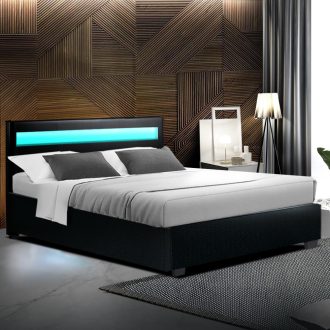
Finally, use wire cutters to connect the positive and negative wires of each strip. Once all four strips are connected, plug in your power source and enjoy your new illuminated bed frame!
Mid-Century Modern Bed
The mid-century modern bed is a classic design that has been around for decades. There are many different ways to style this type of bed, which makes it a versatile option for any home. If you are looking for a bed frame that is both stylish and comfortable, then a mid-century modern bed is the perfect choice for you.

If you have some basic woodworking skills, then you should definitely consider building your own mid-century modern bed frame. This is an excellent way to save money and get exactly what you want in terms of style and comfort. There are many different plans available online that will walk you through the process of building a beautiful and sturdy frame.
Once you have decided on the perfect plan, all you need to do is gather the necessary materials and start building.
Create a Daybed from Reclaimed Wood
If you have some reclaimed wood lying around, put it to good use by creating a rustic daybed! This project is perfect for beginner woodworkers – all you need are some basic tools and some patience.
Start by measuring the area where you want your daybed to go. Cut your lumber to size using a saw, and then sand the edges smoothly. Next, assemble the frame of the bed using wood glue and nails.

For the mattress, you can either use a futon or an old mattress that you don’t need anymore. Place it on top of the frame and secure it with fabric ties or bungee cords. Lastly, add pillows and blankets to make it extra cozy.
Build a DIY Murphy bed
A Murphy bed is a great way to save space in a small room. You can build your own Murphy bed with basic woodworking skills and a few simple tools.
First, you’ll need to decide on the size of your bed. A full-size bed will take up the most space, so if you’re tight on square footage, go for a twin or queen size.
Next, you’ll need to gather your materials. For the frame, you’ll need 2x4s, Plywood, and MDF board. For the mattress, you can use any size mattress that will fit your frame.
To start building the frame, cut the 2x4s to length and assemble them into a rectangle using dowels and screws. Then, cut the plywood and MDF board to size and attach them to the frame using screws or nails.

Now it’s time to add the Murphy bed hardware. This will allow you to fold the bed up against the wall when not in use. There are many different types of hardware available, so make sure to choose something that will work with your particular setup.
Once everything is installed, it’s time to test it out! Put your mattress on the frame and see how it feels. If everything seems sturdy and secure, then congratulations! You’ve just built yourself a brand-new Murphy bed.
DIY Bed Frame Ideas FAQs
Can you DIY a bed frame?
You can customize a DIY bed frame to the size you want, and use the materials you like. Buying a new bed frame can be expensive, but building one yourself will be just a fraction of the price.
Is it okay to have bed on the floor?
You should prevent mould and mildew by periodically propping your mattress up against the wall to let it air out. Keeping a mattress on the floor can result in unwanted moisture issues. Make sure to check for signs of moisture, dust, and bugs whenever you move your bed.
How do you make a strong bed frame?
A bed frame with just a perimeter and a supportive centre beam will be more sturdy and supportive if you add bed slats. This will combat mattress sagging and increase your bed frame’s strength.
How hard is it to make a bed frame?
Building a bed frame on your own is a relatively simple concept. It doesn’t matter if you’re a beginner or an expert, you can build a bed frame to suit your needs. There are only five basic components of a bed: a headboard, footboard, two horizontal rails, and wooden slats that run between the rails and support the box spring.

Conclusion
There are a lot of different ways to make your own bed frame, and it really depends on your personal style and preferences. But regardless of how you do it, DIYing your bed frame is a great way to save money and get exactly the look you want.
So, if you’re feeling crafty and want to add a personal touch to your bedroom, consider one of these gorgeous DIY bed frame ideas. You won’t regret it! Keep visiting Pay Later Alligator for more ideas.
-

Best Balloon Arch Ideas
-
Makeup Vanity Ideas for Small Spaces
-
35 Best Home Decor Ideas
-
How to Recreate a Resort-Like Outdoor Bed Experience at Home
-
20+ Amazing Room Divider Ideas
-
Complete Guide to LayBuy – Shop Now, Pay Later in Australia
-
20+ Creative Makeup Storage Ideas
-
20+ Delightful DIY Mother’s Day Gift Ideas to Show Your Love and Appreciation
-
DIY Couch Cover Ideas


Suggested Product


Releated Posts


Product Added!
Product Removed
You must first login or create an account to add to a Wishlist