10+ DIY Bedside Table Ideas – Beautiful Nightstand for Your Home
If you’re looking for creative ways to spruce up your bedroom, why not start with something as simple as a bedside table? Bedside tables can be so much more than just a place to rest your books and phone. With a few tweaks, they can become focal points of your decor and really help set the tone for the entire room.
DIY Bedside Table Ideas
In this blog post, we’ll explore 10+ beautiful and creative DIY bedside table ideas that will help you transform your bedroom into a cozy and stylish space. Read on to find out how you can use some simple materials and crafty tricks to make bedside tables that are both functional and aesthetically pleasing.
An Industrial Rustic Bedside Table With a Crate
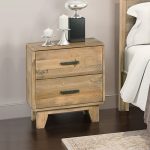
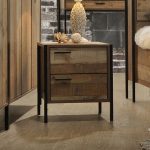
- An industrial rustic bedside table with a crate: This bedside table has a rustic, industrial feel to it, thanks to the crate that it’s made out of. It’s a simple design that would be easy to DIY, and it would add a bit of character to your bedroom.
- A bedside table with hidden storage: This bedside table has hidden storage beneath the top, perfect for storing things like books or blankets. The clean lines of the design make it ideal for contemporary bedrooms.
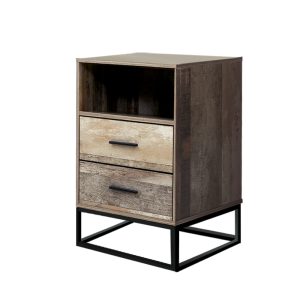
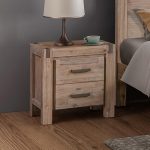
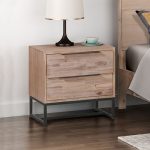
- A rustic bedside table with drawers: This bedside table has a rustic look, thanks to the wood finish and metal handles on the drawers. It would be perfect for storing things like nighttime essentials or extra blankets.
- A glam bedside table: This bedside table is glam incarnate, thanks to the mirrored surface and Crystal knobs. It would be perfect for adding a touch of luxury to your bedroom
Over-Sized and Unique Picture Frame Nightstand
An oversized and unique picture frame nightstand can add a touch of elegance and style to any bedroom. This statement piece can be used to display family photos, artwork, or even as a catch-all for your bedside essentials. If you’re looking for a creative way to spruce up your space, consider an oversized and unique picture frame nightstand.
An Upcycled Pallet Bedside Table
If you’re looking for a creative and unique bedside table idea, why not try upcycling a pallet? With a little bit of elbow grease, you can transform an old pallet into a beautiful and rustic bedside table.
To get started, you’ll need to find a pallet that’s in good condition. Once you have your pallet, sand down any rough edges and splinters. Next, stain or paint the pallet in your desired colour.
Once your pallet is dry, attach four casters to the bottom so it’s easy to move around. Finally, add a glass top to protect the surface of your new bedside table.
A Wall-Mounted DIY Bedside Table
A wall-mounted DIY bedside table is a great way to save space in your bedroom. This type of table takes up less space than a traditional nightstand, and it can be easily installed by following some simple instructions.
To build a wall-mounted DIY bedside table, you will need:
- 1×4 lumber (8 feet long)
- 2 L-brackets
- Screws
- Drill
- Paint or wood stain (optional)
Cut the 1×4 lumber into two pieces that are each 4 feet long. These will be the sides of your table. Next, cut two more pieces of 1×4 lumber that are 2 feet long. These will be the top and bottom of your table.
Use the L-brackets to attach the side pieces of lumber to the top and bottom pieces. Make sure that the brackets are flush with the edge of the lumber so that they will be hidden when the table is viewed from the front. Use screws to secure the brackets in place. Drill pilot holes for the screws first so that you don’t split the wood.
If desired, paint or stain your new bedside table before using it. Attach it to the wall using screws driven into studs, or use heavy-duty drywall anchors if screwing into drywall. Place a lamp on top and enjoy your new space-saving bedside table!
Use a Vintage Barrel
When it comes to bedside tables, there are few things more stylish than a vintage barrel. Not only do they add a touch of class to any bedroom, but they’re also incredibly easy to DIY. Simply find an old barrel at a flea market or antique store, and then sand and paint it to match your decor. You can even use a decoupage to add a bit of extra personality.
DIY Nightstand with Hairpin Legs
If you’re looking for a unique and stylish way to spruce up your bedroom, why not try a DIY nightstand with hairpin legs? This simple project can be completed in just a few hours, and it’s sure to add a touch of personality to any space. Plus, it’s an easy way to save money on furniture!
Here’s what you’ll need:
- One hairpin leg (available at most hardware stores)
- A small piece of plywood or MDF (about 12″ x 12″)
- A drill
- screws (we recommend using 1″ or 1 1/2″ screws)
- A jigsaw (if you’re using MDF)
- Paint or wood stain (optional)
- polyurethane (optional)
- handles or knobs (optional)
First, cut your piece of plywood or MDF to size. If you’re using MDF, be sure to seal the edges with tape before cutting to prevent splintering. Next, use your drill to attach the hairpin leg to the underside of the tabletop. We recommend using two screws for extra stability. Once the leg is attached, flip the table over and finish it off with a coat of paint or wood stain. If you want an extra layer of protection, you can also apply a coat of polyurethane. Finally, add some handles or knobs and you’re good to go.
A Cute and Colourful DIY Bedside Table
A cute and colourful DIY bedside table is a great way to add some personality to your bedroom. This easy project can be completed in just a few hours, and it’s a great way to use up leftover paint or fabric scraps.
To make this project even easier, look for a small bedside table at a thrift store or garage sale. Then simply give it a fresh coat of paint or decoupage some pretty paper or fabric onto the surface. Add a few coordinating accessories, such as a lamp and some books, and you’ve got a one-of-a-kind bedside table that will brighten up any bedroom.
Also Read: Amazing DIY Bed Frame Ideas to Try in This Year
A Stylish Wire Basket Side Table
If you’re looking for a bedside table that’s both stylish and unique, look no further than this wire basket side table. This easy-to-make DIY project is perfect for adding a touch of glam to any bedroom.
To make this bedside table, you’ll need:
- 1 wire basket
- 1 round wooden plaque
- 4 furniture legs
- Gold spray paint
- Glue gun & glue sticks
- Drill & 1/8″ drill bit
First, spray paint the furniture legs and wooden plaque gold. Let them dry completely. Then, use the drill to make four holes in the wooden plaque, evenly spaced apart.
Next, glue the furniture legs to the underside of the wooden plaque. Be sure to place them so that the holes you drilled are lined up with the holes in the legs. Once the glue is dry, flip the plaque over and screw it onto the top of the wire basket.
That’s it! Your new bedside table is now complete. Style it with your favourite books, magazines, or plants and enjoy your newfound bedroom chic!
Ladder Nightstand
If you’re looking for a nightstand that’s both unique and stylish, why not try making your own ladder nightstand? This easy DIY project can be completed in just a few hours, and it’s a great way to add some extra storage to your bedroom. All you’ll need is a ladder, some wood boards, and a few other supplies.
To get started, cut the boards to size and then attach them together using screws or nails. Next, attach the ladder to the top of the nightstand using brackets or L-braces. Once everything is secured, sand down the surface and stain or paint the nightstand as desired.
If you want extra storage space, you can add shelves to the sides of the ladder or even hang baskets from the rungs. Just use your imagination and have fun with it!
- Also Read: 10+ Best DIY Small Laundry Room Ideas
Easy and Fun Painted Wooden Crates
These easy and fun painted wooden crates are a great way to add some extra storage to your bedroom without spending a lot of money. You can use them to store books, magazines, clothes, or anything else you need to keep handy. Plus, they add a nice pop of colour to your room!
A Neat and Simple Wooden Box for Your Bedroom
If you’re looking for a neat and simple bedside table solution, then this wooden box idea is perfect for you! All you need is a wooden box (or two, if you want to make a matching set), some paint or varnish, and some casters or furniture feet. To add a personal touch, you could also decorate the outside of the box with carving, inlays, or other woodworking techniques.
Hanging Crate Nightstand
If you’re looking for a unique and stylish way to spruce up your bedroom, look no further than this hanging crate nightstand! This easy DIY project will add personality and storage to your space, without breaking the bank.
You’ll need:
- 1 wooden crate (we used a 12″ x 12″ x 6″ crate)
- 1 set of 2″ screws
- 1 set of 1.5″ screws
- 4 L-brackets
- Drill
- Paint or stain (optional)
Instructions:
- Start by painting or staining your crate, if desired. Let dry completely.
- Next, attach the L-brackets to each corner of the crate using the 2″ screws. Be sure to predrill holes for the screws to avoid splitting the wood.
- Once the brackets are in place, flip the crate over and mark where you’d like to hang it on the wall. We hung ours about 20″ above our bedside table. Use a level to make sure your marks are even before drilling into the wall.
- Drill pilot holes into the wall at your marked points, then screw in the 1.5″ screws until tight. Hang your crate on the screws and fill it with books, magazines, candles, or whatever else you need close at hand while relaxing in bed
Bedside Table Made of Wine Crates
If you’re looking for a bedside table that has a bit of rustic charm, then this option made out of wine crates is perfect for you. It’s easy to put together, and you can finish it off with a coat of paint or stain to get the look you want. Plus, it’s a great way to upcycle old wine crates if you have any laying around.
DIY Bedside Table FAQs
What Can I Use as a Side Table?
There are many alternatives to floating shelves, including chests, trunks, stools, bar carts, crates, and barrels. In addition to being more affordable than traditional side tables, some of these alternatives can help you save money.
Is It Necessary to Have a Bedside Table?
In case you feel thirsty during the night, the safest place for a glass of water is at the side of your bed. The decorative balance of a bedroom can be improved by having a bedside table with an attractive design. Besides adding style to the bed, it is also a great way to organize the clutter around your room.
At our online store we also provide following bedside tables:
- Floating Bedside Table
- LED Bedside Table
- Mirrored Bedside Tables
- Sets of 2 Bedside Table
- Side Table
- Wooden Bedside Table
What Goes in a Small Space at End of the Bed?
At the foot of your bed, place a seat to maximize space in the bedroom. As well as adding a luxurious touch to a room, a sofa or ottoman can serve as a storage space as well. In addition to providing a comfortable sitting area, ottomans provide extra surface space.
- Also Read: 10+ Cheap DIY Garden Path Ideas
Final Words
Takeaway: If you know what you need, bedside tables are easy to make.
If you’re anything like me, you often find yourself searching for the perfect bedside table. But no matter how many stores you hit up or how many online retailers you browse, you just can’t seem to find that perfect table. Well, if you know what you need, bedside tables are actually quite easy to make! Keep visiting Pay Later Alligator for more ideas.
With a little bit of creativity and some elbow grease, you can easily create a bedside table that’s both stylish and functional. Not sure where to start? Check out these beautiful and creative DIY bedside table ideas for inspiration:
- Use an old dresser: If you have an old dresser that’s seen better days, don’t get rid of it just yet! With a little bit of sanding, painting, and L brackets, you can easily transform an old dresser into a chic bedside table.
- Repurpose crates or boxes: Have some old crates or boxes lying around? Put them to good use by turning them into rustic bedside tables! Just add some castors to the bottom so they’re easy to move around, and voila – instant style.
- Make a floating shelf: Floating shelves are not only trendy but also super easy to make! All you need is a piece of wood (you can even repurpose an old door or window!), some L brackets, and some screws. Attach the L brackets to the wall at your desired height, then screw
Product Added!
Product Removed
You must first login or create an account to add to a Wishlist


